Home Keg Coupler Components: Must-Have Kegerator Accessories
Have you ever questioned why your draft pours either full of foam or completely flat? It all comes down to the tiny yet powerful parts that link your keg and tap. If you don’t have the proper hardware, even a great beer can go flat and lose its taste.
Installation Parts Supply understands that flawless pours begin with reliable components. Whether you’re a homebrewing enthusiast or just love fresh draft beer, understanding these keg parts diagram pieces ensures every glass is served just right.
From washers to gas lines, each part plays a role in maintaining pressure and flavor. Upwards of 90% of pouring problems are due to incompatible or damaged parts. Understanding these parts is the key to a trouble-free draft system.
Notable Observations
- Proper coupler selection ensures optimal beer flow and flavor.
- Count on Installation Parts Supply for trusted draft setup parts.
- Regular maintenance prevents common pouring problems.
- The style of coupler depends on the beer you’re pouring.
- The majority of malfunctions start with coupler problems.
Define the Kegerator Coupler
The perfect draft beer starts with the right connection between your keg and tap. Think of the keg coupler as the connector between your CO₂ cylinder or nitrogen tank and the beer line, employing pressurized gas to deliver beer flawlessly to your taps. Consider it the powerhouse of your draft beer system—remove it, and the flow stops.
That tiny gadget serves a dual purpose: gas delivery to pressurize and valve control to pour your beer. Inside, you’ll find a probe, a check valve, and separate ports for gas and liquid. Each part ensures your brew stays carbonated and pours without foam.
| Part | Role | Common Issues |
|---|---|---|
| Probe | Punctures the keg seal | Leaks if not aligned properly |
| Check Valve | Stops beer from flowing backward | Worn valves lead to flat beer |
| Gas/Liquid Ports | Links to tubing | Foaming from loose connections |
Attaching the coupler wrong is a rookie mistake—75% of first-time users do it. That leads to foam floods, leaks, and ruined beer. Installation Parts Supply offers compatibility charts and video guides to help you get it right.
Universal designs mean most couplers work similarly, but always match yours to your keg type. A mismatched setup won’t just ruin your pour; it could damage your equipment.
Keg Coupler Varieties and Applications
Different beers call for different couplers. Matching the right coupler to your beer ensures optimal carbonation and flavor. Follow this guide to choose the right one.
D-Type Coupler (Sankey)
Most North American brews—about 85%—use this style. That valve locks onto domestic kegs with ease. Quick hint: Find the “Sankey” imprint on it.
Nitro (U) Coupler
The harp emblem identifies it for nitrogen blends like Guinness. Nitro beers rely on its special gas ratio for a silky head. Don’t jam a U-style onto a regular keg—no proper seal results.
Reverse-Thread S System Coupler
Heineken and other European imports need this reverse-thread version. Its reverse thread stops you from screwing it onto a D keg. Trivia: It stands a bit taller than the North American model.
Specialty European Couplers
German and UK beers demand specialized connectors:
- A-Type Coupler: Fits Paulaner and Warsteiner kegs perfectly. The “slider” mechanism is foolproof.
- G System: Fits Bass and Boddingtons with its tri-flat stem. Found in pubs throughout Britain.
- M System: Made for Schneider Weisse kegs. Its click-lock ensures it’s seated.
Their guide highlights D in green, U in black, S in blue. One Midwestern brewery cut costs by $3K annually with the right couplers. Never rely on “universal”—real compatibility wins.
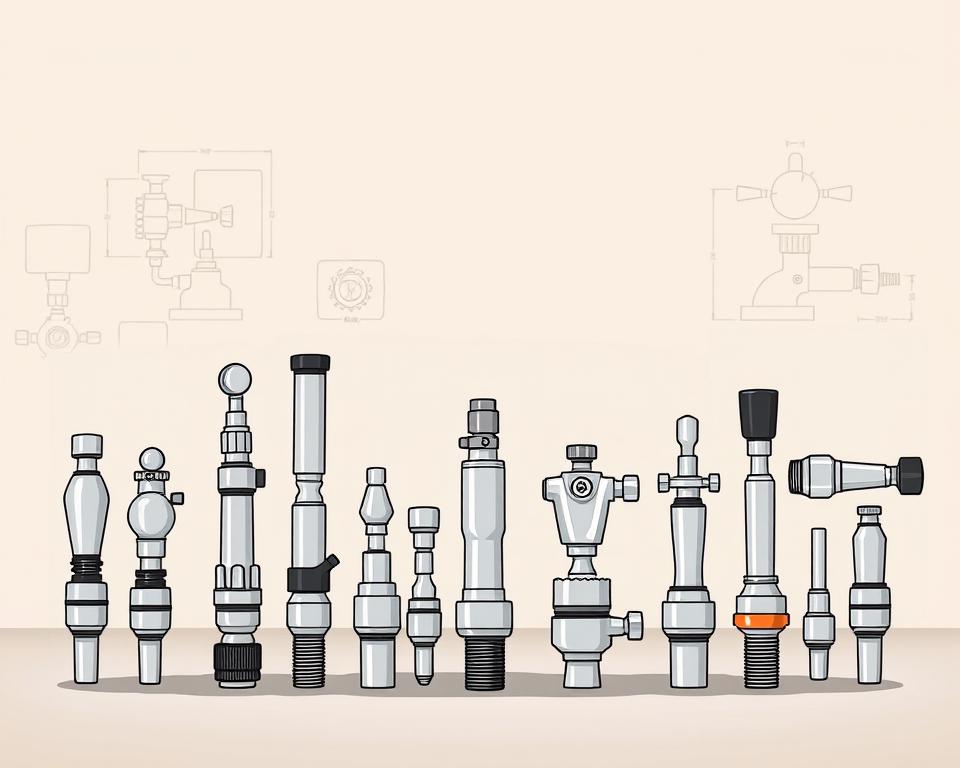
Coupler Parts Breakdown
Behind every smooth pour lies a set of precision-engineered components. These small but mighty pieces ensure your beer stays carbonated and flows flawlessly. Let’s break down the key hardware that keeps your system running.
Probe + Return Valve
The stainless steel probe pierces the keg’s seal, controlling beer flow. Premium models last 3x longer than economy versions. Below it, the check valve blocks backflow—Installation Parts Supply’s most-replaced part.
Hex Nut and Washers
Everything tightens up around the hex nut. Brass suits budgets, but stainless steel resists corrosion. Pair it with nitrile washers for cold temperatures—EPDM rubber cracks faster below 40°F.
| Component | Material | Key Benefit |
|---|---|---|
| Probe | Stainless Steel | Long-lasting |
| Return Valve | Food-grade plastic | Stops foam issues |
| Hex Nut | Brass or Stainless | Balances cost/durability |
Gas and Liquid Ports
Your gas port should see 20–30 PSI pressure. Mismatched pressure causes foam. Use 3/16″ tubing for beer lines; 1/4″ causes extra agitation. Keep a rebuild kit on hand for quick fixes.
Pro Tip: Change seals twice a year or per 50 kegs. A $3 washer replacement beats a $150 coupler failure.
How to Set Up Your Kegerator Coupler
A proper install ensures ideal pours. Correct hookups avoid pouring issues. Here’s how to hook it up without hiccups.
Attaching Coupler to Keg
Open the handle, fit lugs into place. Turn clockwise until snug—over-tightening damages the seal. Slim models save 4–5″ of headroom.
Installation Parts Supply’s torque wrench ensures hex nuts are secured at 8–10 ft-lbs. A misaligned probe causes 80% of leaks. New washers keep your system sealed.
Line Connections
Use 5/16″ MFL fittings to attach the gas line. Seal threads to stop CO₂ from escaping. For beer lines, 10–12 feet of 3/16″ tubing balances pressure drop.
| Task | Equipment | Note |
|---|---|---|
| Gas Line | Thread sealant | Test at 30 PSI for bubbles |
| Draft Line | Tubing cutter | Cut straight for proper seals |
| Pressure Test | Soapy water | Check for 24 hours |
Modern rigs offer app-based pressure feedback. One Denver brewpub reduced foam by 40% with our quick-connects. Turn off gas immediately if you spot big leaks.
Coupler Troubleshooting
Foamy eruptions are the quickest way to waste beer. Once you know what to check, most issues are easy to fix. Here are the usual culprits and how to remedy them.
Foam & Leak Fixes
Foam is blamed in nearly 70% of draft problems. Start by checking your temperature—ideally 38°F for most ales. Warm beer releases CO₂ prematurely.
Next, inspect your beer line connections. Soap and water will bubble up where gas is escaping. Snug fittings carefully; overtightening can harm seals.
- Check ball can lead to uneven pours and audible leaks
- Not sure on PSI? Use this guide:
| Beer Type | CO₂ PSI | N₂ Ratio |
|---|---|---|
| Lagers | 10–12 | N/A |
| Stouts | 25–30 | 75% nitrogen |
Coupler Fit Problems
Loose couplers almost always trace back to worn seals. Replacing seals corrects about 40% of these problems. Warped coupler faces may need replacement.
Use plastic shims to level off rough keg tops. They’re a cheap way to stop wobble. Low-profile models solve clearance problems in compact coolers.
Pro Tip: Keep a five-seal washer kit on hand for emergencies. A Chicago bar cut waste by 18% after training staff on these quick fixes.
Remember—frost on your CO₂ tank signals overuse. Allow the tank to warm up prior to any valve tweaks. Annual gauge calibration keeps readings true.
Cleaning and Maintaining Your Keg Coupler
A clean draft system means crisp, fresh-tasting beer every pour. Leftover yeast and oils harm both taste and pouring. A quick cleaning regimen prevents issues.
Taking Apart & Soaking
Start by taking apart the coupler. Take off the handle, pull out the probe and valve. Soak all parts in warm water with 1 oz of PBW per gallon for 15–20 minutes. That will strip away yeast residue and hop buildup.
Our brushes get into the smallest crevices. Pay extra attention to the ball valve—it’s a common hiding place for gunk. Flush well to prevent soap residue.
Cleaning Products
PBW (Powdered Brewery Wash) is a top pick for its pH balance. Acidic solutions are efficient yet rough on rubber. Ultrasonic cleaners remove buildup in pro bars.
- Drying: Blow dry or wipe with a microfiber towel.
- Sanitizing: Follow FDA CFR 117 guidelines—30 seconds of contact time kills bacteria.
- Logs: Use a log sheet to record each cleaning.
Ultraviolet systems help sterilize parts. Rinse waste per regulations—PBW can damage plumbing. A little effort ensures quality pours and extends your system’s life.
Final Thoughts
Enjoy crisp, fresh beer by mastering your draft beer system. Matching the right hardware, regular cleaning, and proper setup make all the difference. Installation Parts Supply offers lifetime support and seasonal discounts on rebuild kits to keep your pours perfect.
Regular upkeep can stretch your hardware lifespan by seven years. Grab the free compatibility guide or sign up for a pro webinar. One yearly inspection prevents headaches—our long-term customers agree.
Time to level up: head to Installation Parts Supply and improve your home bar.